Support & Guides
Nonin Oximeter
Breathe RM can collect your oxygen saturation data either through smartwatches or by connecting directly to the Nonin pulse oximeter. This guide focuses on setting up your Nonin device. If you're using a different pulse oximeter or a smartwatch, please return to the guides overview.


Step 1
Select Oximetry from settings
Make sure that your phone has Bluetooth turned on. Open Project Breathe app and tap the ‘settings cog’ in the top right hand corner of the dashboard. Under ‘My Devices’ tap on ‘Oximetry’

Step 2
Place oximeter on your finger
Turn the Oximeter on by popping it on your finger. Device search will begin. Breathe app may ask you for permission to use your location. Don’t worry – no information on your whereabouts is captured or stored, but this permission is required for connecting to certain Bluetooth devices. Tap ‘OK’ to carry on.

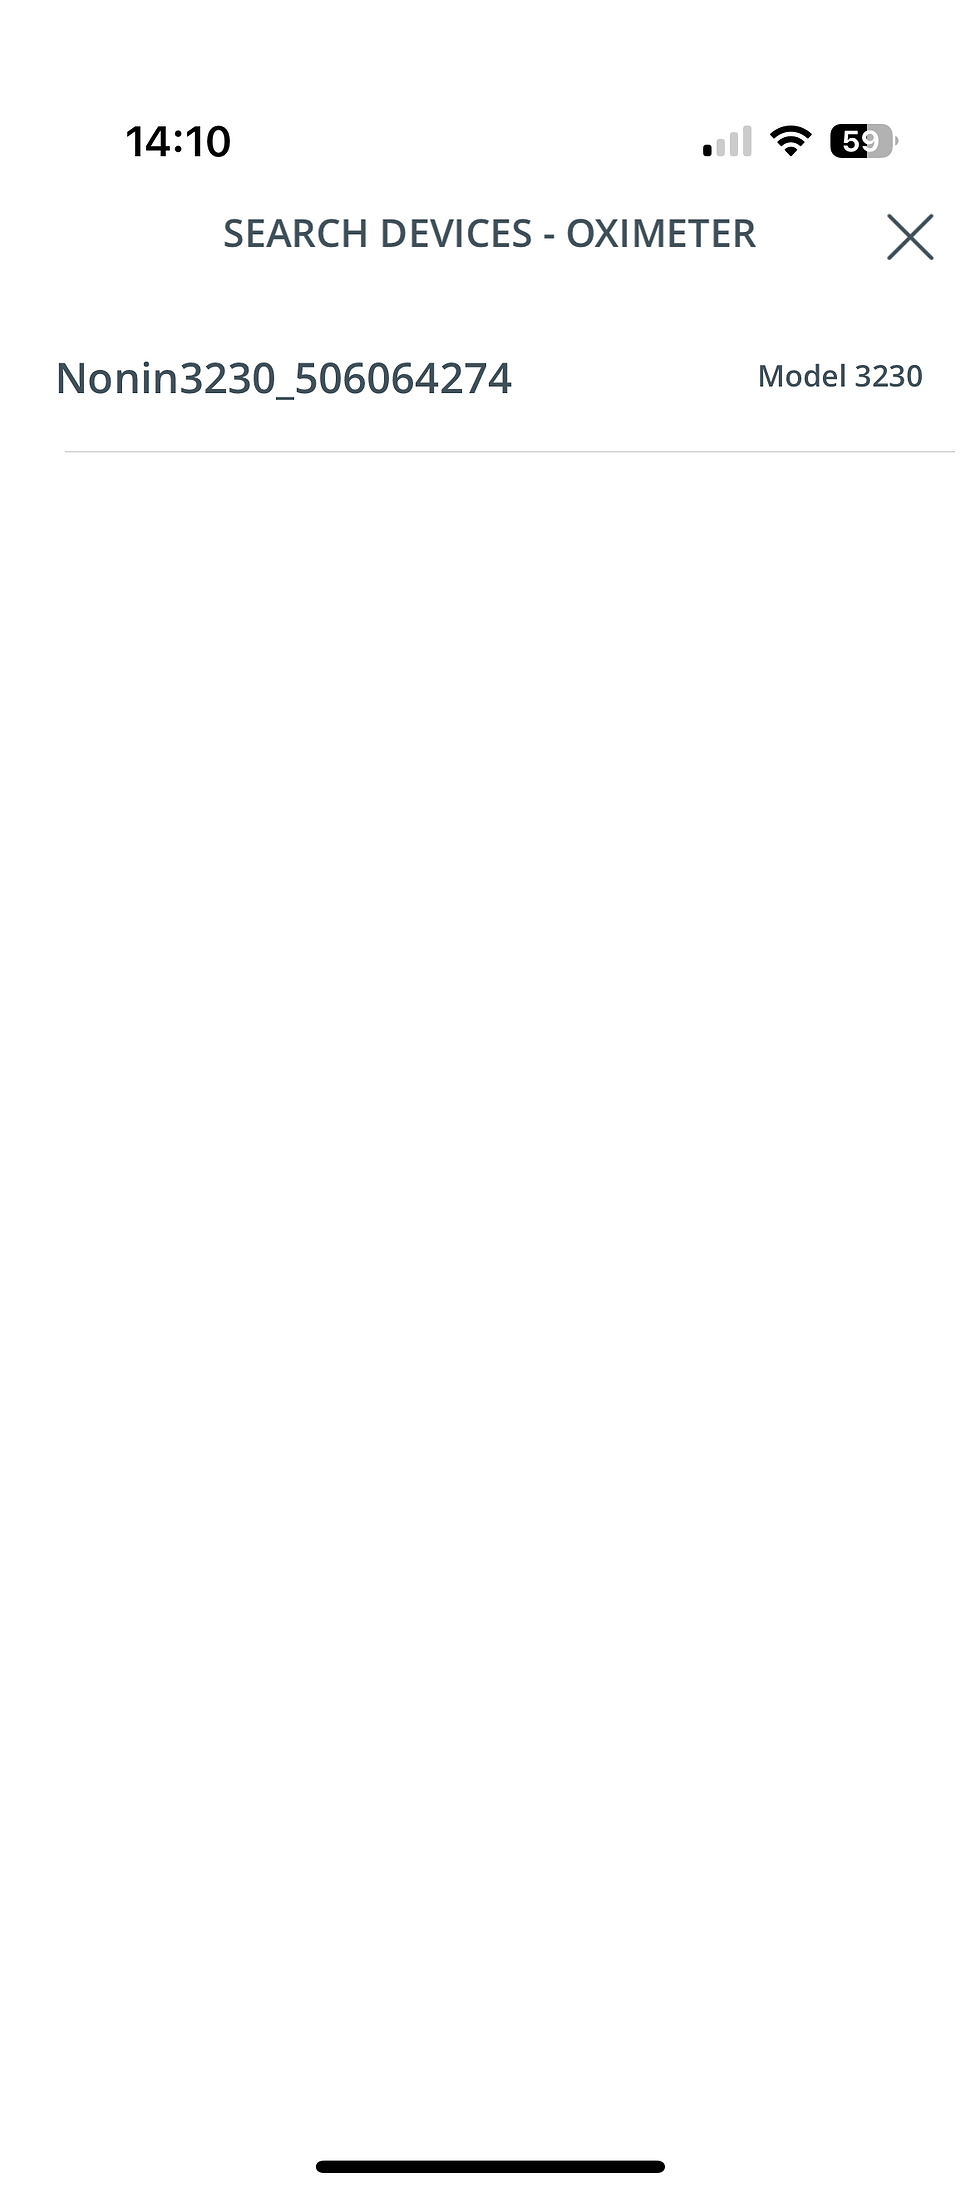
Step 3
Select your oximeter
Once an Oximeter has been found, the device name will appear in the list with a name which begins with “Nonin3230_”. Tap the device you want to add. *Important: If the device asks to pair with your phone, accept this pairing request.
Step 4
Set up complete
That’s it! Either go ahead and record your blood oxygen straight away or save and exit.

Step 5
Oximeter Saved
When you return to ‘Settings’ you should see your oximeter device name saved in ‘Oximetry’.

Step 6

Step 7
Step 8
Step 9
Step 10
Step 11
Step 12
Step 13
Step 14
Step 15
Frequently Asked Questions
Add a Title
Add paragraph text. Click “Edit Text” to update the font, size and more. To change and reuse text themes, go to Site Styles.
Step 16
