Spirobank Spirometer
Step 1
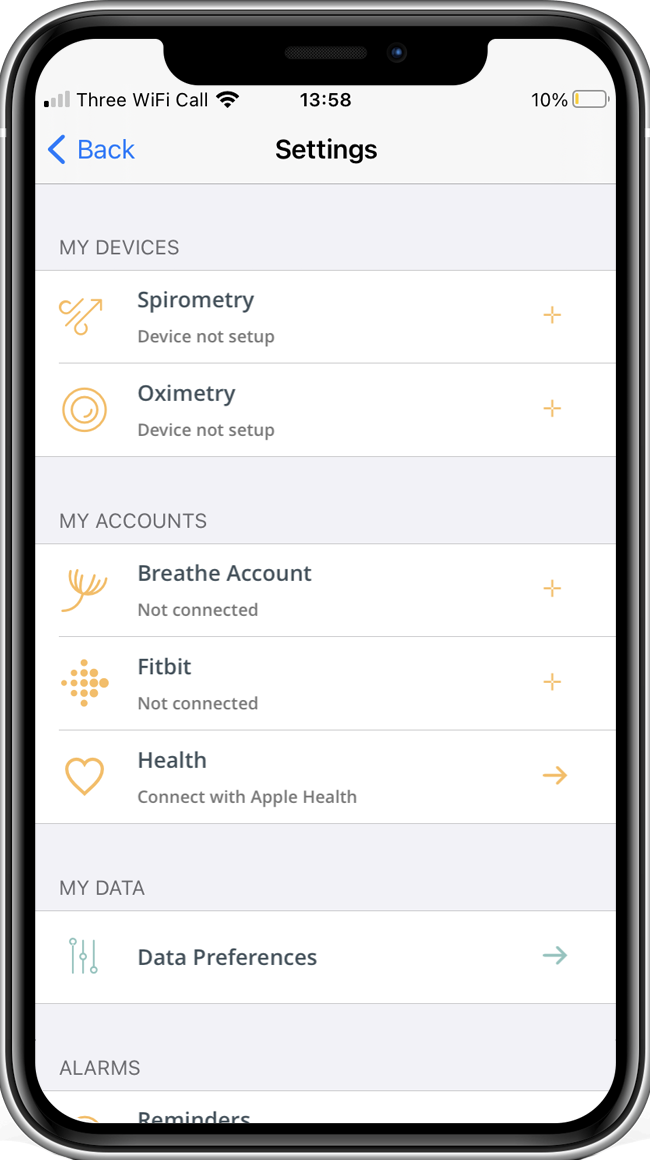
Before starting, make sure that your phone has Bluetooth turned on. Turn on the spirometer device too. Open the Breathe app and click the ‘Settings’ cog in the top right hand corner. Then, in the ‘My Devices’ section, tap on ‘Spirometry”
Step 2
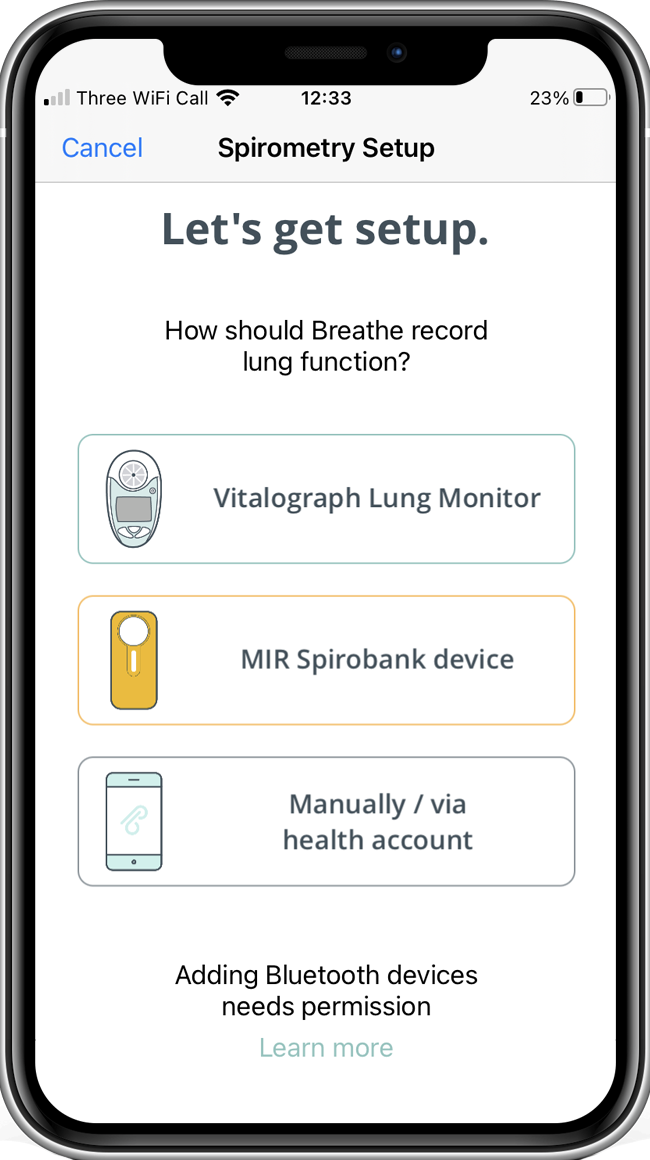
Select MIR Spirobank device from the list

Step 3
Breathe may ask for permission to use your Bluetooth or location. Don’t worry – no information on your whereabouts is captured or stored, but this permission is required for connecting to certain Bluetooth devices. Tap ‘OK’ to carry on.

Step 4
MIR spirometers require you to create a personal profile. The profile data is only stored locally on your phone and not shared.

Step 5
Add the turbine type you are using to the profile. The turbine is at the base of the mouthpiece. Please note the colour options.

Step 6
Your MIR spirometer will calculate your predicted values based on the profile data you have provided. *if these numbers do not look correct to you, revisit the set-up pages.

Step 7
With profile completed, device search will begin, once a Spirometer has been found, the device(s) will appear in the list. Tap to connect.

Step 8
That’s it! Either go ahead and record a blow straight away, or save and exit.

Step 9
When you return to ‘Settings’ you should see your spirometer in the list of devices.
Spirobank Spirometer
Step 1
Step 2
Step 3

Step 4
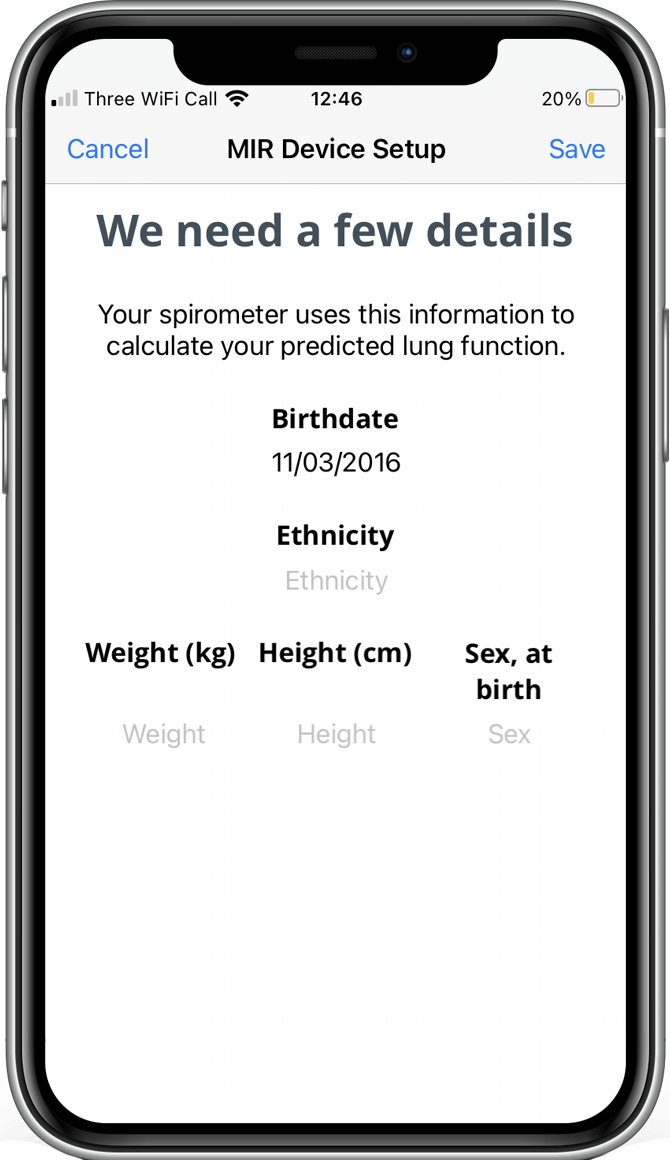
Step 5
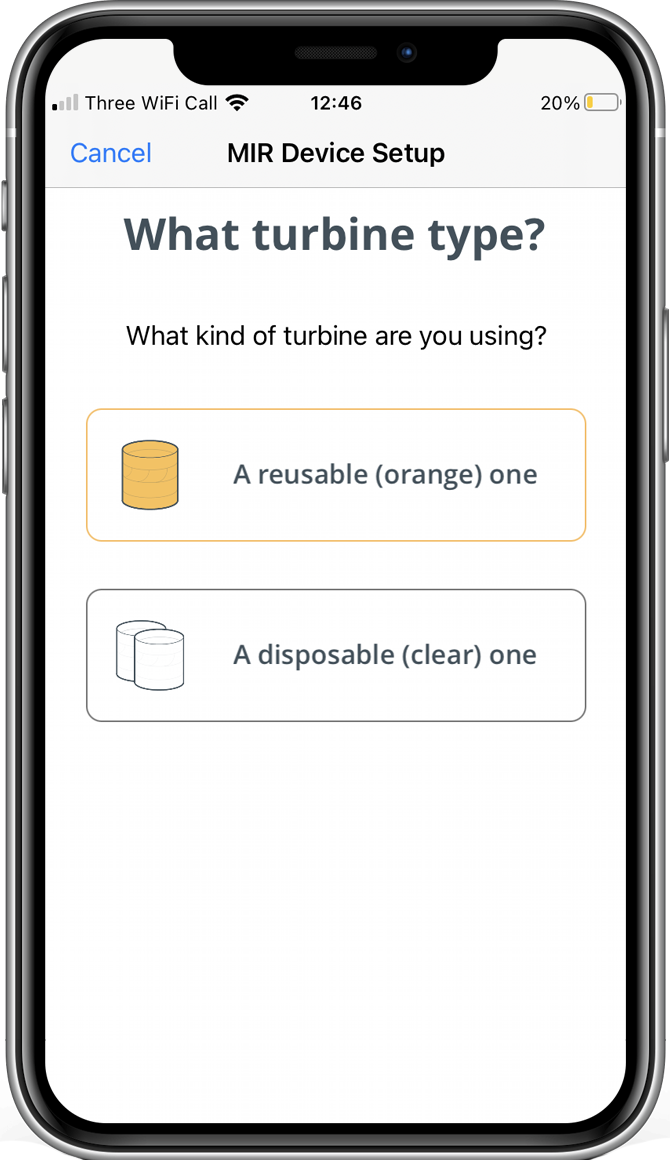
Step 6
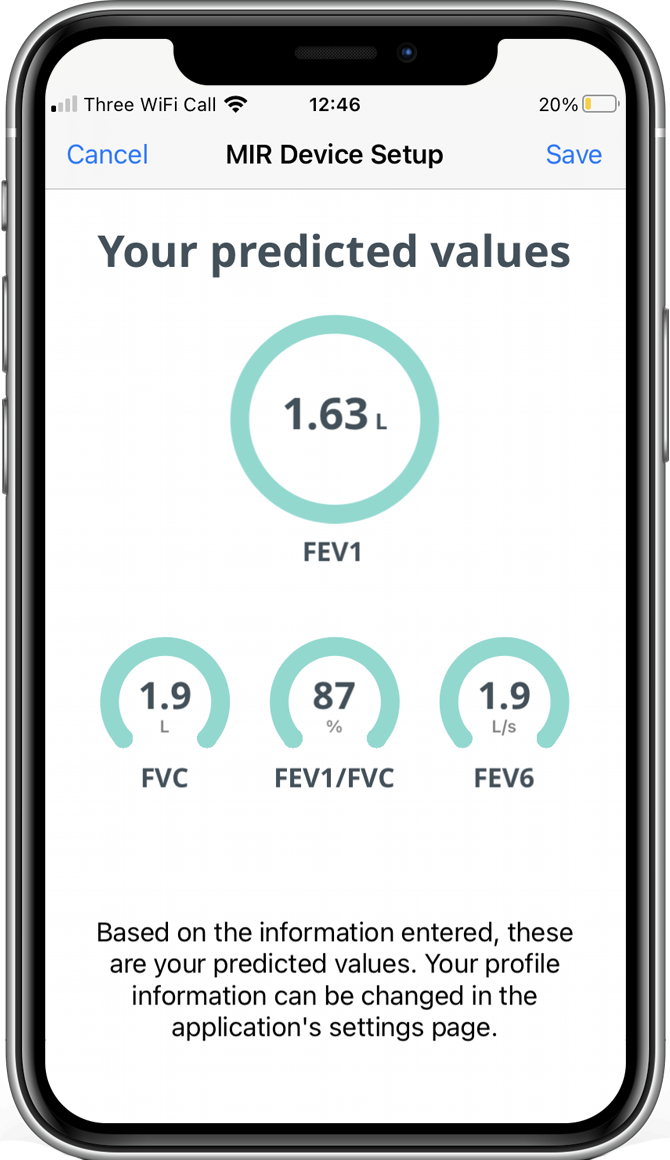
Step 7
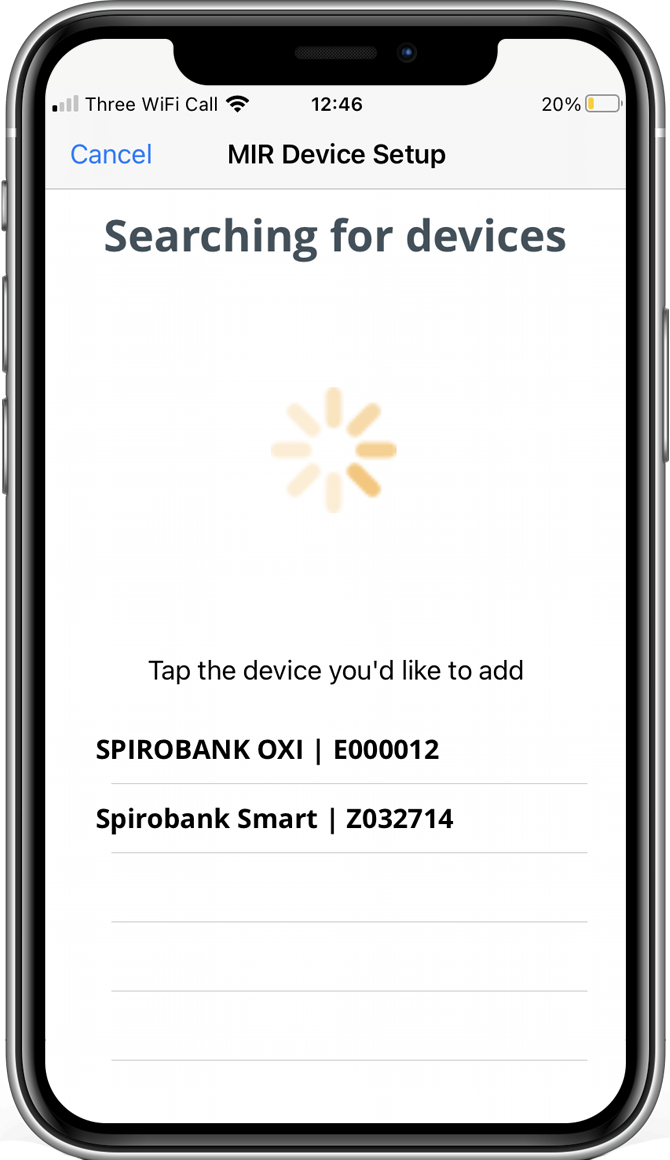
Step 8
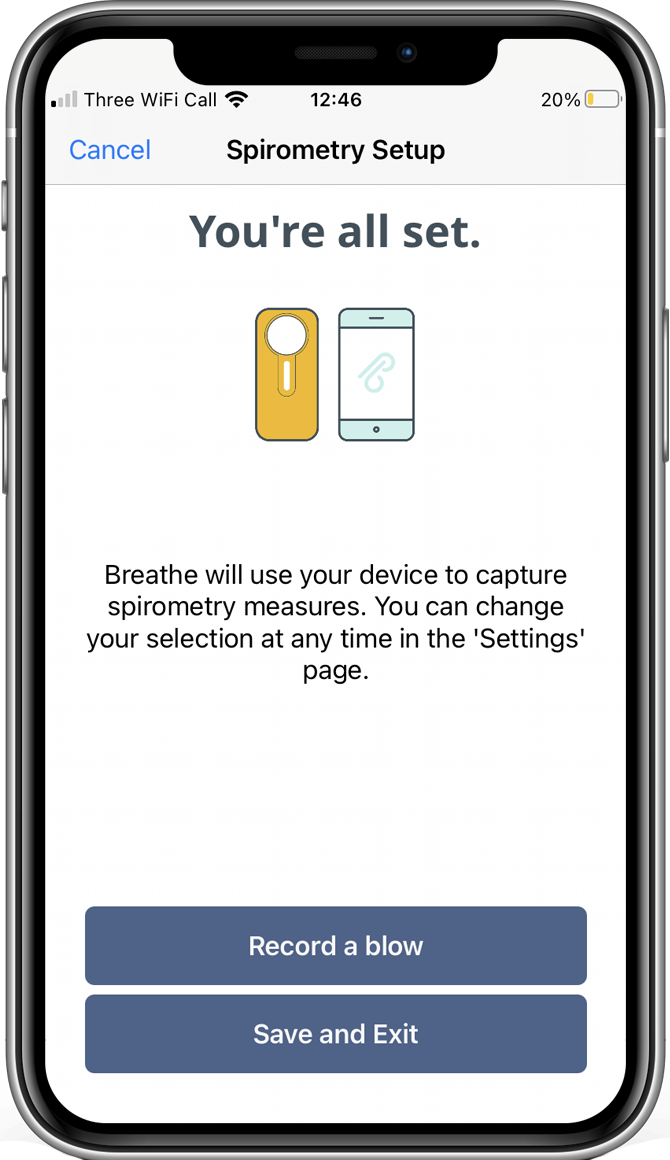
Step 9

Frequently asked questions & known issues
Why is my Spirometer not connecting via Bluetooth?
Due to an Android 12 update, some Bluetooth devices need to be set up again in your Breathe RM app, for them to work. Firstly make sure you have the latest Breathe RM app (3.10.1 min), then go to Breathe RM settings and delete your spirometer. You can then re-add the same spirometer and it should once again connect.
Help! I cannot see my spirometry data
Having trouble seeing spirometry data as a result of upgrading your app to 3.10.0 or 3.10.1? The remedy for this is to delete your app and reinstall it. Make sure you sync all recent data first in your Breathe account settings page. After deleting and reinstalling the app, log into your Breathe account before you do anything else. Once the data sync has completed, check your data is all displaying as you would expect, before adding new data. If the problem is still not fixed, contact your research team for support.
Why is my app stuck searching for my spirometer?
To work with Bluetooth devices including spirometers and oximeters, Breathe requires that you grant the ‘Bluetooth’ or ‘Location’ permission. If you don’t grant permission, then any Bluetooth functionality will not work. You can check the status of these permissions within your phone’s settings page. On an Android device, check the ‘App Permissions’ page. On an iOS device, check your ‘Privacy’ settings. On either platform, you should be able to see Breathe in the list of apps that have the permission enabled. On certain Motorola phones, you should also check that you have ‘Find my device’ turned on, in the ‘Location services’ section.
Why is my app stuck in a ‘connecting’ state?
If the app gets stuck in a ‘connecting’ state, try closing the capture page and retrying. If this doesn’t help, close the capture page before turning the spirometer or oximeter off and on again, then trying again to record a measurement. If you are still unable to record a measurement, turn the phone’s Bluetooth feature off and back on again. Try using the phone’s Bluetooth settings page to search for your devices and create a pairing with it. Finally, restart Breathe app, you should now be able to record the measurement.
Why does my spirometer display not match with the numbers in my Breathe app?
The Vitalograph spirometer is factory-set to display PEF as its first measurement. Scroll through the display screen using the right hand (arrow) button next to the screen, and you will find your FEV1 measurement. This value should match the figure recorded in Breathe App.
I accidentally closed the app before I had saved my lung function, where has my measurement gone?
Breathe app will only save a lung function measurement once you have pressed the “Save” button. Always try to do three good blows and select to record the best measurement before navigating away from this page.
My spirometer has disconnected but I have only taken one measurement, what should I do?
Your spirometer may time out and turn off before you have recorded 3 good blows. If you only have one measurement, you can save that measurement if you wish to, or you can dismiss the capture page and begin again.
What do the icons on my Vitalograph spirometer mean?
Here are the commonly seen icons, or symbols on the Vitalograph spirometer:  If the image displayed on your device is not found in the above image, you can obtain further information in the online manual here.
